How to wire a photocell to multiple lights? The photocell mechanism is very useful and important nowadays, when there are so many sources of light, and you require to turn them all off and on when it is necessary. The mechanism works in such a way that it relies on the amount of light in a certain area, for example, the house or the street. And when there is enough light, the photocell turns the artificial lights off, and vice versa.
But another essential feature of the photocell is that you can wire a photocell to multiple lights at once, so you do not have to control each one of the lights.
So, the issue is how to do it — how to wire them all together. And in this article, you are going to discover all the methods that you can use and answer the question of how to wire a photocell to multiple lights.
The photocell: general information
Before we dive deeply into the topic, it is necessary to remind ourselves what the photocell is and how this mechanism works.
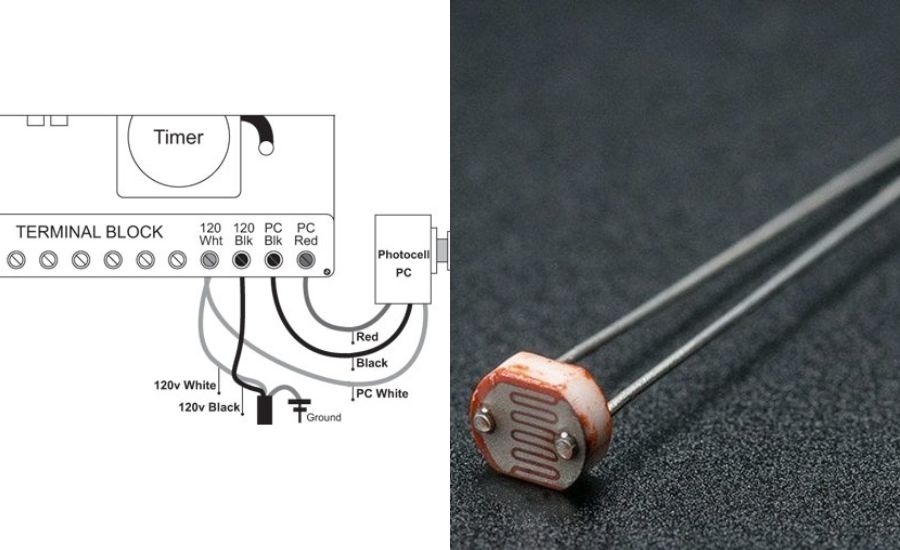
So, a photocell, also known as the light receptor, is a useful mechanism that can locate visible or infrared light and then work based on this data. At the moment when the photocell finds the lights, there is an immediate electrical current, which then goes to the devices that the photocell controls.
For instance, the lights. It works with the outdoor lights, the inner lights, and a light fixture. It is like the photo control light sensor.
In the mechanism of a photocell, we can find several important components: the resistor and two terminals.
The resister changes whenever the photocell notices the lights.
So, as you can see, if the lights are being controlled by the photocell, then when the photocell detects any unusual light, the lights are going to be turned off or on. It is the way it generally works.
How to wire a photocell to multiple lights?
Now we can look through several methods that you can apply to wiring the photocell to multiple lights.
Tip! Be careful during the process of any method because you are dealing with electricity, which can be quite dangerous. So, you get to know how to act in such circumstances.
But before we go right to the ways to wire a photocell to multiple lights, you should pay attention and accomplish the general instructions. You should read them before trying to use any of the methods.
Instructions on what to do before wiring
Before wiring a photocell to multiple lights, complete these steps successfully.
Step 1: find out the number of lights
Knowing the number of lights is essential to wiring a photocell. Without this information, you are not able to do anything with the photocell. So, you should find out the number of lights. And you should pay more attention to the wattage rating of the photocell itself.
Because the power rating shows you exactly how many lights you can wire with the photocell and how many of them the photocell can control.
You should then divide the power rating in watts of the photo control light by the power rating of the light fitting. It is in watts as well. With this data, you can analyze the number of lights that you can connect to the photocell and then connect them to the light, light fittings, and light fixture.
Step 2: find out the number of circuits
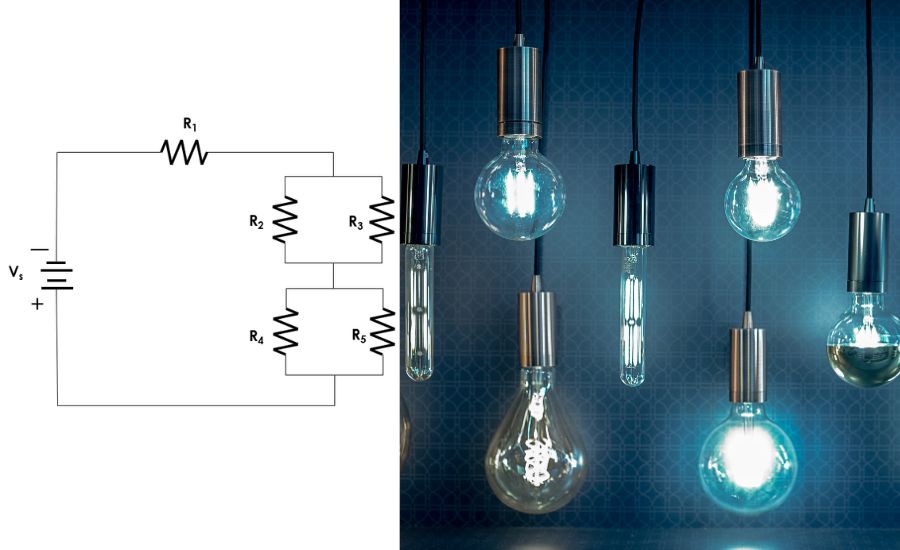
The next thing you should do is discover the number of circuits, counting every last light circuit. You have to calculate the current that is drawn by every last light you are going to wire to the photocell. You require the number of lights and the power rating to figure it all out.
Furthermore, you need to look at the total number of them that you acquire.
Then you get to understand how many lights the circuit breaker can power. Because if there are more lights than the circuit breaker can actually handle, further, you have to consider getting another circuit breaker to deal with the last of the lights, for sure.
Step 3: find out if you use the lighting indoors to divide power
So, in this step, you require to find out if you are going to apply the indoor lighting circuits and their power source for the lights that are going to get wired with the photocell.
Because if you do not hold too many lights to wire with the photocell, then using the indoor lighting power supply is quite reasonable, and you can actually do it.
But if there are too many lights, then it is totally not recommended at all. Because the inner power supply is just not going to handle it, and you may lose both the indoor lighting and the outdoor lighting connected to the photocell.
You should just evade the existing indoor lighting circuit, for sure.
You definitely get to apply another, separate circuit instead of sharing power. Or you should just add the outdoor security lights to check it.
You have to clearly determine the source of power that you are going to apply with the photocell. And it must not be existing indoor lighting circuits. You should also make sure that the supply would be enough for the outdoor lighting fixtures or the light fittings.
Step 4: establish the electrical conduit
Now you are going to install electrical conduit pipes. You get to accomplish the electrical conduit piping right after the previous steps. You should use all the data that you have collected during the last steps. This information lets you know where you get to install the conduit pipes.
Step 5: put the cables through the pipes
In this step, you get to make the wires right through the installed electrical conduit pipes. This step requires most of your attention; you need to be careful with connecting the photocell with the light fixtures.
So, you need three terminals and three cords. You get the wires, these cords, through the conduit pipes. You get to make it correctly, because this essential step is going to let you connect them to the photocell easily and without any problem.
Step 6: attach the photocell
Now is the right time to install the photocell in the construction you have made. You get to turn on the lights, and then you get to set up the photocell. Be attentive, because right now the photocell must not switch off the lights. And you get to place them in a spot where it would be easy for a photocell to detect the light.
Methods to connect a photocell to the lights
At this moment, that the basic actions have been completed, it is time to penlight several methods that you can apply to attach the photocell to multiple lights fully and successfully. Further, you are going to fully get aware of how to wire a photocell to multiple lights.
You should try them out to make sure that the photocell is connected to multiple lights and everything works perfectly.
You should read the instructions carefully on how to wire a photocell to multiple lights and stay safe while completing any of the methods below.
Use the power switch
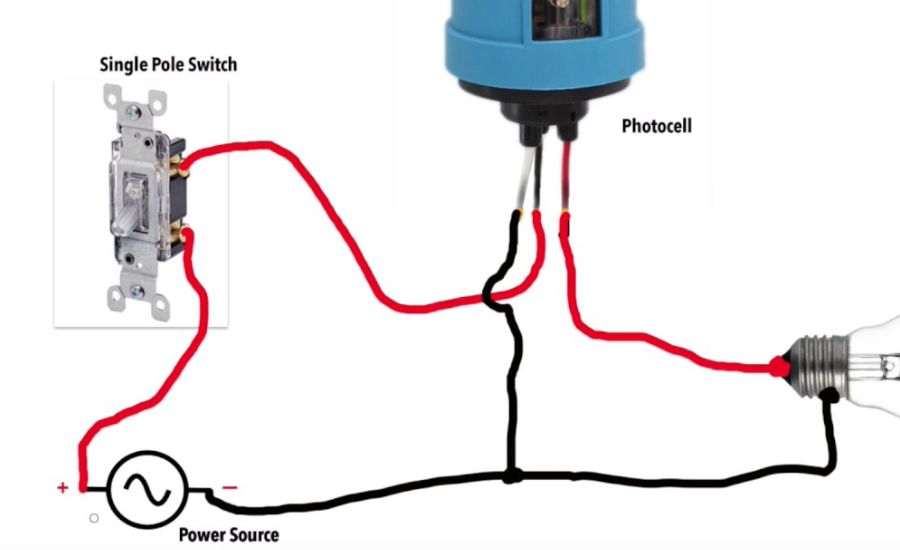
The power switch is one of the easiest ways to unite a photocell to multiple lights so that it would operate efficiently and brightly. Everything that is from you with the photocell switch is installing the power switch at the power supply that you apply for the photocell switch and the lights.
The photocell switch uses three cords and a neutral wire.
With the photocell switch, you can regulate the photocell and unite it to the lights with the neutral wire and the switch. You can switch on and off the power supply with the switcher.
Apply the power splitter
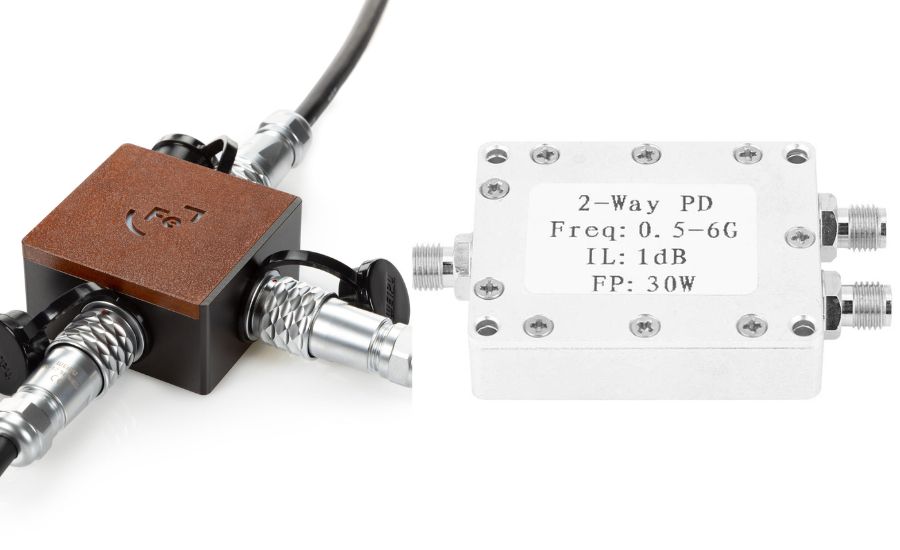
The power splitter works in the way that you get to divide the power source into several outputs, usually from two to four, but it depends on the certain amount of lights that you use. So, you get to plug in the photocell into one output of the power source, and further you should plug in the lights into other outputs.
So you are providing power to the photocell and the lights, and at the same time, you let the photocell control multiple lights. It is a universal solution, especially with the fact that photocells usually use low voltage.
Use power multiplexing
You should also apply power multiplexing because it gives you even more opportunities. It is so, because, with power multiplexing, you can use the SPDT toggle switch. To apply this toggle, you only get to AC power and three cords, not two.
You can freely apply the power multiplexing and the switcher to give the photocell the ability to manage multiple lights. It is easy and does not take too much effort.
Try this method out, and you will see the result straight away. It also helps with LED outdoor lights and other outdoor lighting systems.
Use the relay box
This is a different option to apply when it comes to connecting the photocell to multiple lights. This option is good and useful, except that it requires more wiring and more effort from you to install all the things and make it work.
So, to handle this method and connect the photocell to the lights, you have to wire every light to the relay, and further, every relay is needed to get connected to the switch. And only after that, you can unite it to the photocell. As said, it requires more time and effort, but it is still an option.
Apply the isolation method
You are also able to use the isolation method, also known as AC decoupling. This variant is especially useful in situations when you have a lot of lights to connect to a photocell, and you do not desire to add another power source.
So, to apply this method effectively, it is required of you to provide every light bulb with the AC cord separately, and then you get to connect it right to the power source that you apply. The photocell, on the other hand, has to be plugged right into the circuit of every light.
It is so complicated because the photocell requires to get electricity only from the bulbs or security lights. This is a kind of feature of this method, but you should not be afraid of it, for sure. Because it is still quite good and optimal to use without losing too much time and money.
Anyway, the result is definitely worth the effort.
Use the transfer box
Using this method, you can get the power cord right through the compartment. You also get to make sure that the lamp sizes fit the transfer box. And you should also know that you should use the pre-wired lamp. It is a recommended option.
In case you have more than one light box, when you are going to connect it to the photocell, you should snip the wires and then unite them all together again.
In this situation, you get to make sure that there is only a single cord that goes through the transfer box.
Use this method, and all the lights you are using will be united to the photocell and will turn off and on automatically, with or without security lights.
Use the external photocell to control multiple lights
This is another variant, but you should only apply this method if another just didn’t work out and the photocell does not work.
So you get to use the external photocell and plug all the lights into it through the wall.
But you get to memorize that this solution must be used only temporarily until your original photocell is repaired or replaced with another. Because this method is usually not very safe, it must be the last resort. You should use any other previous methods, but, again, it depends on the situation that you have.
Specifically for this method, you should not forget about any precautions when it comes to working with electricity. You should act very carefully and try your best to stay safe.

In conclusion, it is easy to connect a photocell to lights
Now you are aware of how to wire a photocell to multiple lights. As you have seen through the article, there are no big obstacles for you to unite the photocell to multiple lights. There are so many methods that you can apply, that you can say that they solve any possible problematic situation with the photocell and the lights.
Preparing to regulate the photocell to the lights is not very difficult either. All you have to do is read all the instructions carefully, select the preferred method of connection, and apply it safety.
Frequently Asked Questions
How many lights can you put on one photocell?
It depends on the photocell that you have because the number of lights that a photocell can regulate varies. You can find it out yourself easily. You should just take a look at the photocell and find the wattage rating. Because exactly the power rating shows you exactly how many lights a single photocell can manage.
Can one photocell control multiple circuits?
Yes, one photocell can regulate multiple circuits and actually get to control them, if you intend to unite the photocell to multiple lights. When it comes to attaching the photocell to manage a lot of lights, it is crucial and one of the main steps that you have to do. It can even be with LED lights. In the instructions above, you are going to find out how to do it.
How do you wire a photocell in series?
There are several ways that you can cable a photocell in series and connect it to multiple lights. For example, you can use a power switch, a relay box, a power splitter, a transfer box, an external photocell, an AC decoupling method, and power multiplexing.
There are all the usual methods to apply. Some of them are easy, and some of them are a little complicated, but it depends on which photocell you apply, how many lights you intend to attach to a photocell, and what power supply you have.
So, you should read the instructions and select the way that suits you the most.
How many watts can a photocell handle?
It depends on the photocell you have and its size. And it also depends on the low-voltage currents that you use with it. For instance, the photocell can be powered by twelve volts DC, if you use the usual house sockets, which are usually powered by 120 volts AC.

